Calendly Onboarding Guide for Listing Owners
Overview
Here are just some of Calendly’s features.
- Calendly helps you book better meetings, faster, by syncing and integrating everything in one intuitive platform.
- Set your availability and choose the type of meeting you want to have.
- Connect to all your calendars so you’re never double-booked.
- Stripe Integration (i.e. Payments can be taken right from the form.)
- Zoom Integration
- Google (Calendar/Meet) Integration
- Microsoft 365 (365/Teams) Integration
- 14 days Free – Sign up now.
Calendly Setup
- Sign Up for Calendly.
- Fill in your profile information. (Note: For crispness and to not cut off the subject matter of your profile photo, please use an image that is 160 x 160 px and has the subject matter as centered as possible.).
- Click ‘Next’ to proceed to the ‘Integrations’ portion of the setup.
Integrations
As outlined above, Calendr provides some nice integrations and we will cover those here,
Google (Calendar / Meet)
- Click on the ‘+’ button under ‘Integrations’.
- Choose ‘Google (Calendar / Meet)’.
- Sign in with the desired Google account.
- Click ‘Allow’ to give Calendr the permissions it needs.
Microsoft (365 / Teams)
- Click on the ‘+’ button under ‘Integrations’.
- Choose ‘Microsoft (365 / Teams)’.
- Sign in with the desired Microsoft account. (Note: If the account you are using for Calendr is not an admin-level Microsoft 365 account, you will also be prompted to sign in with an admin-level account.).
- If prompted (see the previous step), click the link to sign in with an admin-level account, enter those credentials, and choose to grant the necessary permissions for Calendr.
- Click ‘Allow’ to give Calendr the permissions it needs.
Stripe
Before you begin this section, you need to have a Stripe (Free) account set up a verified.
- Click on the ‘+’ button under ‘Integrations’.
- Choose ‘Stripe’.
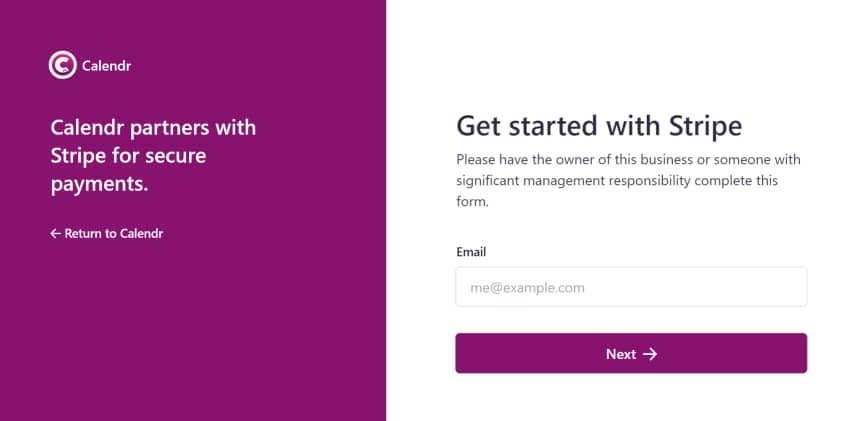
- Authenticate with your Stripe account.
- Select an existing Stripe sub-account or create a new account. (Note: For this guide, we are creating a new sub-account, and this is because Stripe may, in the near future, require new sub-accounts to be created on a per solution basis, rather than using a sub-account with multiple solutions.).
- Select an existing Stripe sub-account to copy your legal information from or start anew. (Note: For this guide, we are copying over our existing legal information from another account.).
- Click ‘Next’.
- Enter your new business details and click ‘Submit’.
Zoom
- Click on the ‘+’ button under ‘Integrations’.
- Choose ‘Zoom’.
- Sign in with your Zoom account.
- Click the ‘Pre-approve’ button.
- Click the ‘Authorize’ button.
Sync
As mentioned above, Calendr provides unlimited calendar connections and if you were to utilize multiple calendar connections, the Sync settings are where you would specify which calendar has precedence.
- Specify the calendar(s) that you want to absolutely avoid double-booking in.
- Configure the primary calendar for syncing booking entries into.
Availability
This is where you will let people know when you are available for booking and you have the option to choose between a simple configuration or a more complex configuration.
Booking Page
At the bottom of the ‘Availability’ setup, you’ll notice a ‘Make Your First Booking Page!’ button, and clicking on that button brings up the Booking Page Editor.
Booking Page
- Event Details > Enter your desired information. (Note: In the right-hand panel you can see how your booking page will look once published.).
- Payments > If you want to charge for the bookings, choose the Stripe account that you set up using this guide, set your desired currency, and enter your payment terms. (Note: If you are going to charge for bookings, we recommend including a link to your Terms & Conditions policies as part of your payment terms.).
- Event Duration > Set the maximum number of minutes the event can last and enter your fee amount. (Note: Additional durations can be added and unique pricing can be applied to each of them.).
- Location Settings > Set the location for the event.
- Event Hosts > Leave as-is for now and optionally circle back later to update your booking page if you decide to set up an organization where you work with other team members.
- Location > Choose the integration you would like to use to conduct the meeting or use the ‘Custom’ option. (Note: For the purposes of this guide, we are using the ‘Custom’ option with some text to say that meeting information will be shared over email after the booking is submitted.).
- Availability > Use the default or specify a custom availability for the meeting.
- Booking Options > Meeting available every > Set the max number of bookings you are willing to allow per hour.
- Booking Options > Minimum notice > Set the minimum amount of notice you need before you can be booked. (Note: To avoid any last-minute bookings, you can set a minimum notice period. This will ensure that if, for example, we are at 13:00 on a Tuesday afternoon, and you have set the minimum notice period to 2 hours, then the earliest time slot that a Guest can book with you will be 15:00.).
- Booking Options > When can events be scheduled? > Set your desired period of time to allow bookings.
- Guest Questions > Add any additional questions you would like to ask the guest.
- Email Notifications > Chose your desired reminder interval and optionally provide additional reminder intervals.
- Shareable Link > Leave the link as-is or specify a custom link that you can share with others.
- Click ‘Save & Exit’.
At this point, you will be presented with some optional steps to ramp up your bookings.
- Book meetings straight from LinkedIn by copying your unique link to your profile page. Click to open LinkedIn.
- Tell your LinkedIn connections that you’re now open for meetings & appointments, by posting to LinkedIn.
- Add your unique booking link to your email signature. (Note: Clicking on the link Calendr provides, they will give you email signature options with your booking information automatically injected.).
- Maximize traffic conversions by embedding your event on your website, with the provided link.
Event Management
Visting your Calendr dashboard gives you the option to do a number of things related to events.
Note: You can also get to your dashboard by clicking on the Calendr icon in the header.
- View the events as visitors would see them on the front end
- Copy your unique event links
- Edit your Booking Pages
- Add new events
- Generate and copy email signatures
- Grab your embed code
- Design your embedded form
- Delete an event